In this section, we will fully teach you how to configure fonts, lines and paragraphs in Word software in a simple and comprehensive language.
What do you think is the most popular text editor in the world today? Of course it is Microsoft Word! This software has a wide range of functions that may seem a bit complicated in appearance. However, in addition to "visible" features, it has hidden options and shortcuts that can make your editing easier. In this article, we are going to introduce you to the top tips and tricks for Microsoft Word that you may not be aware of.
Select text vertically
We usually choose our sentences, paragraphs or words horizontally. But sometimes we need to select them vertically. For example, when there is a column of numbers at the beginning of the text and you have to select these numbers so that you can delete them all at once.
In this case you can use a vertical selection. Simply hold down the ALT key, then click and drag your mouse down to make your selection. Do not forget to drop the ALT before your selection is complete - otherwise the Research window will not appear. You can practice with more vertical choices and find many uses for it.

Set line spacing by default
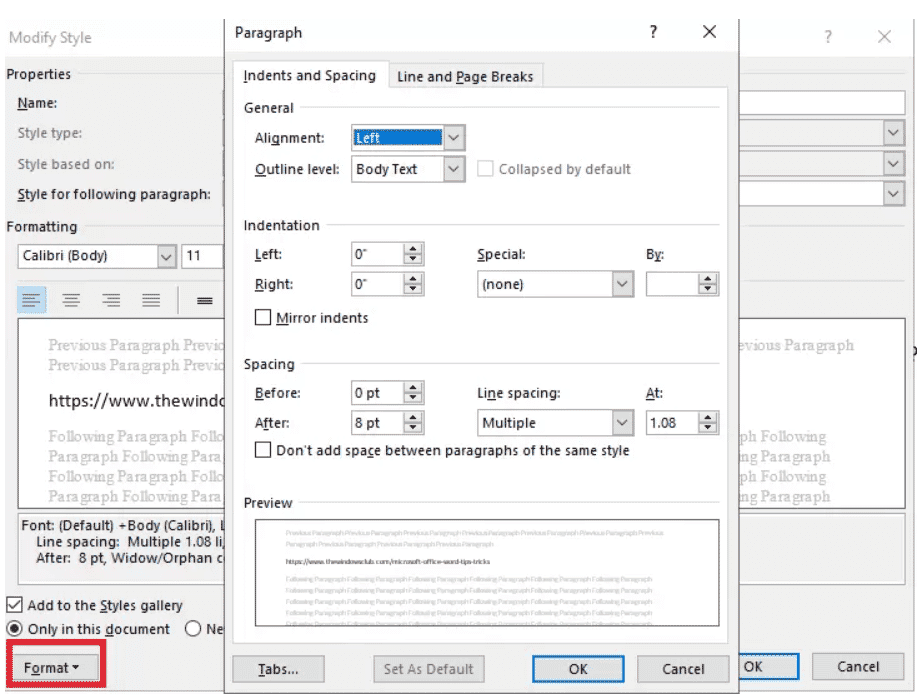
If you are using Microsoft Word 2010, the line spacing is 1.15 by default, while in Microsoft Word 2003 this parameter is set to 1. Microsoft concluded that the change would improve the readability of the text. Some users do not agree with this decision. If you disagree with Microsoft, you can change the default line spacing to 1:
- 1) Go to the "Home" tab, find Normal Style (in "Style"> "Normal").
- 2) Right-click the style and click "Modify".
- 3) A new window will appear with the "Format" option - select "Paragraph" from its drop-down menu.
- 4) Find the "Spacing" section and set the "line spacing" parameter to 1.
- 5) Click "OK".
- 6) Find the box "New documents based on this template" and check it.
- 7) Click "OK".
Change the default storage location of documents
You can save your files using the "Ctrl + S" key combination. But when you use this combination for the first time, the program opens the "Documents" folder by default. You may want to be shown another location to store all your files there first, use the following instructions to solve this problem:
- 1) Click on "File".
- 2) Select "Options".
- 3) Click "Advanced" in the left sidebar of the window that appears.
- 4) Drag the bar down to the right to see the "File Locations" option.
- 5) Click on "Document" and select "Modify".
- 6) The "Save File" window will appear. You must type or select the path where you want your file to be saved and click "OK".
- 7) Press "OK" again to close the window.

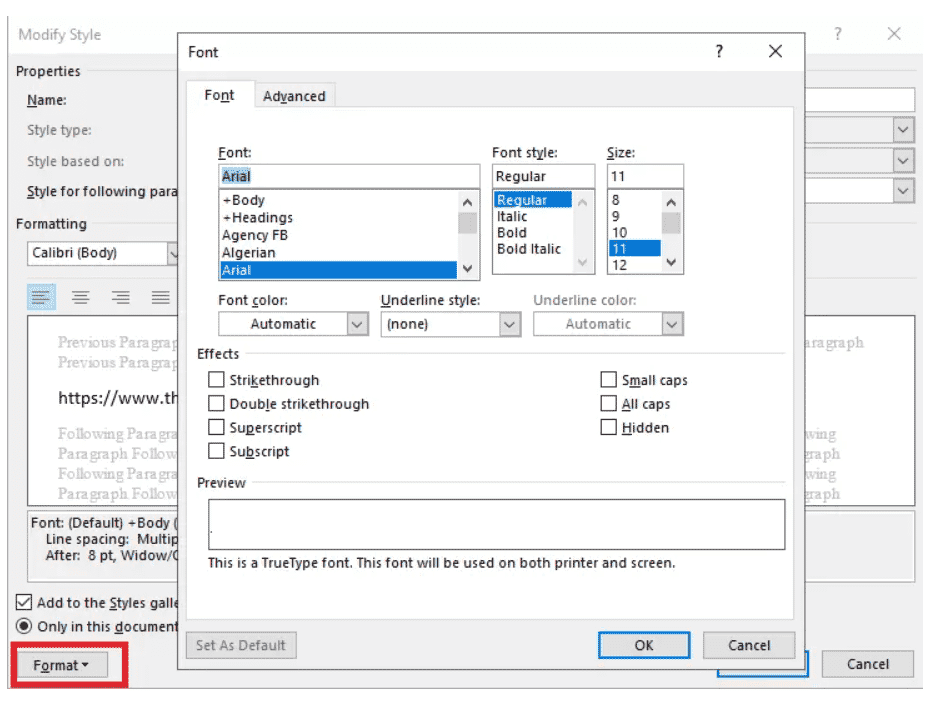
Change the default font
Microsoft Word 2010 uses "Calibri" as the default font. This font is good for reading, but when it comes to printing, its status is not very interesting. You may use other fonts in the print version, such as "Arial" or "Times New Roman" and.. Of course, you can change the shape of your text by selecting any font in the "Home" tab, but your format may be cluttered. To solve this problem, you can select another default font to work with Word software.
- 1) Right-click on "Normal Style" in the "Home" tab.
- 2) Select "Modify".
- 3) Click "Format" in the window that opens. Click "Font" in the drop-down menu.
- 4) Now just select the font you want for the program default.
- 5) Here you can change other font settings such as size, etc.
- 6) Click "OK".
- 7) Check the "New documents based on this template" option.
- 8) Click the "OK" menu to close the "Modify" menu.
Move the text row in the tables
Many users work with tables in MS Word. It is very important to be able to move rows in the table (up / down) without confusing the table format. Copying and pasting is an easy solution, but it may change the format.
Alternatively, you can use the "ALT + SHIFT + UP" key combination (up arrow) to move a row up. A combination of (down arrow) "ALT + SHIFT + DOWN" moves one row down. Before using these combinations, you must select the desired row to move. In this way, the format will remain the same and will not change.
Resize line spacing
If you want to change the standard line spacing between paragraphs, MS Word has a shortcut that will get you the result you want:
- Press "CTRL + 1" to make the line spacing equal to 1.
- Press "CTRL + 2" to set the line spacing to 2.
- Press "CTRL + 5" to make the line spacing equal to 1.5.
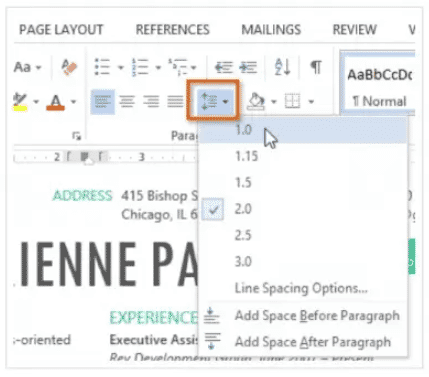
Line spacing is the spacing of lines in a paragraph. Microsoft Word allows you to adjust line spacing to your liking. Spacing can be normal (one line up) and double (top two lines) or any space you want. By default, the line spacing in Word 2013 is 1.8, which is slightly more than a normal spacing. In the text below you can compare different shapes of line spacing. from left to right; This image shows that the default distance is single and double
Line spacing format
1. Select the desired text.
2. In the "Home" tab, select "Line And Paragraph spacing". Select the command you want from the specified menu.
3. Move the mouse over the various options. A preview of the line spacing will appear on your text. Select the distance you want.
Adjust line spacing
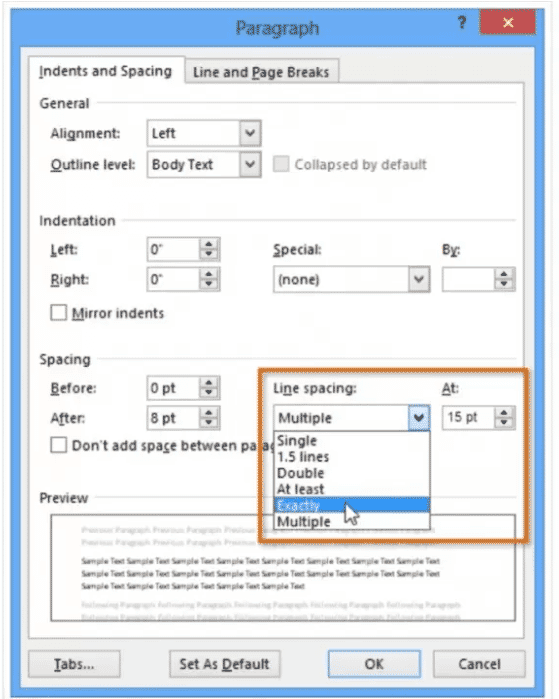
Spacing options are not limited to lines. In the "Line And Paragraph spacing" menu, select "line spacing" to adjust the distance more precisely. You have a number of additional options that you can use to adjust the spacing to your liking.
Exactly: When you select this option, the line spacing is exactly the font size you like. The spacing should be slightly larger than the font size. For example, if your text is 12 dots, you should use a 15-dot spacing.
"At least": This option allows you to select any spacing you want. However, if you have text of different sizes in a line; The spacing can be increased to fit larger text.
Multiple: This option allows you to write the number of distances you want. For example, select "multiple" and change the distance to 1.2; The text opens a little more than normal. If you want the distances to be closer together you can choose a smaller number like 0.9.
Add margins to paragraphs
You can easily add margins to your text paragraphs using the "Border and Shading" menu. But if you want to add just one border at the bottom, just type three special characters and press "Enter":
- 1) Press the "-" key three times and press "Enter". This will create a line (size 3.4).
- 2) Press "_" three times and press "Enter". This creates a line of (size 1.5).
- 3) Press "~" three times and press "Enter". A zigzag line is created.
- 4) Press "*" three times and press "Enter". A dot line is created.
- 5) Press "=" three times and press "Enter". A double line is created.
Find a specific format
If you have a specific text in your document, you can easily find it. For example, you can find all paragraphs that have highlighted words or sentences or specific fonts. In the same way you can search for text that is "bold / italic". To do this, you must use the "Find" feature.
- 1. Press "CTRL + F". If you are using "MS Word 2010", "Find" will be on the left side of the page.
- 2. Find the down arrow in the search bar near the magnifying glass icon. Click on it and select "Advanced Find".
- 3. Click "More" in the next menu that appears.
- 4- In this section, you will see an additional section with multiple search options and the "Find" section with two buttons - "Format" and "Special".
- 5. Select something to appear in the "Find what" search box. For example, you can click "Format"> "Font"> "Arial" - this font will be added to the "Find what" section above. You can select additional properties in the same way.
paragraph spacing format
In this example, we increase the space before each paragraph to separate them. This makes reading the text easier.
1. Select the paragraph or paragraphs you want.

2. In the "Home" tab, select "Line And Paragraph spacing", hover over "add space before paragraph" or "remove". A paragraph preview will appear in your text.
3. Select the space you want to use in the paragraph. In the examples, select the "add space before paragraph" tab.
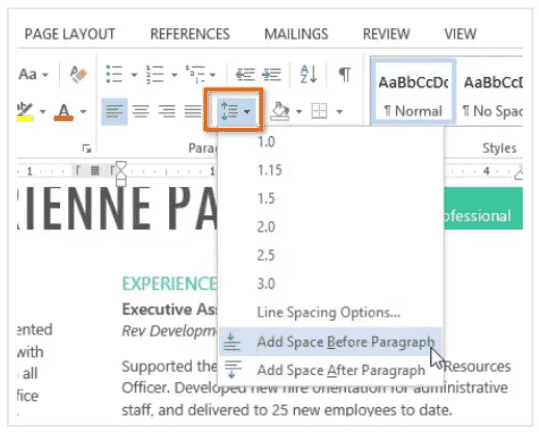
4- Paragraph spacing in the text can be changed.

You can also select "line spacing options" from the menu that opens to open a paragraph window. From here you can set the distance before and after the paragraph.

You can easily save all the changes you made by default in Word and then apply them automatically to the new text.